How to Repot Indoor Plants Without Stressing Out You or Your Plant
You’re watering your plant one morning when you notice it roots curling out of the drainage hole at the bottom, practically waving for help. The soil dries out within a day of watering. The plant hasn’t pushed out a new leaf in months. Is something wrong? Do you need to act now? And what if you try to fix it and make things worse?
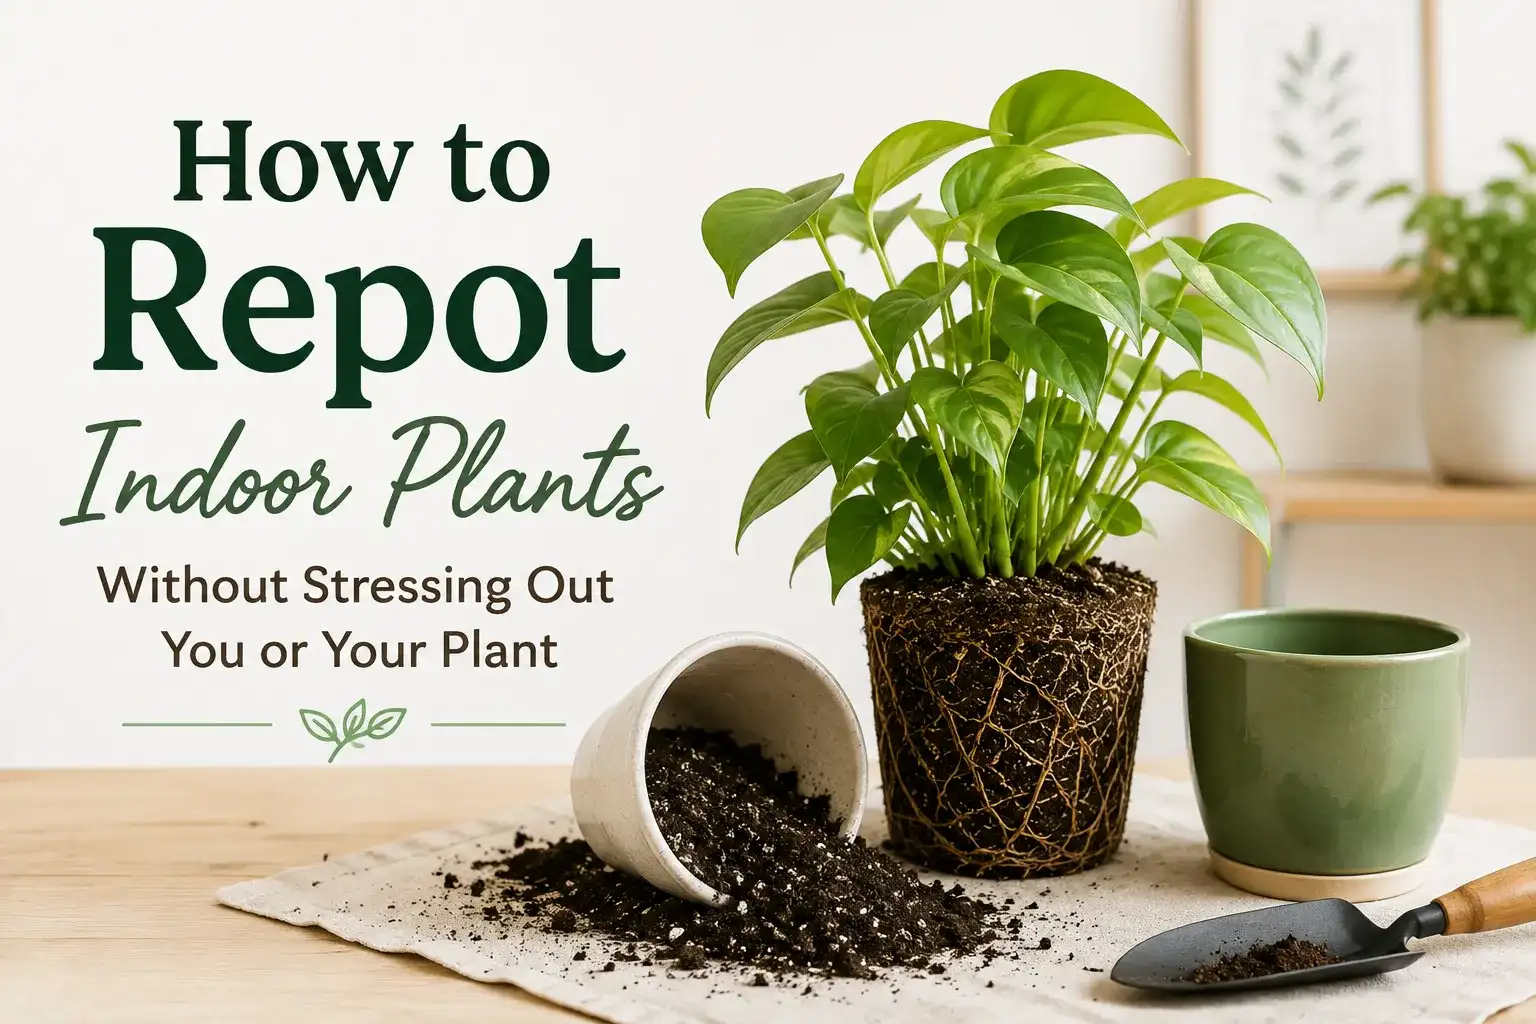
Here’s the honest truth: Learning how to repot indoor plants is one of the most practical skills a plant owner can build, and it’s far less complicated than it looks. Repotting simply means moving a houseplant into fresh soil, a new container, or both giving the roots fresh growing medium and, when needed, more room to grow.
To repot an indoor plant, choose a pot only slightly larger than the current one, add fresh potting mix to the base, tip the plant out gently, loosen the root ball, set it at the same depth as before, fill in around the roots with soil, and water thoroughly.
beginner indoor plant care guide
That’s the core of it. The rest is doing each step without rushing.
What determines how much light indoor plants need
Three factors set a plant’s light requirement: species and native habitat (understory plants evolved for shade; desert natives evolved for intense sun), growth stage and season (which changes how a plant responds to and uses available light), and leaf characteristics (variegation and leaf thickness affect light sensitivity, though not in one uniform direction).
Species and native habitat
A plant’s native habitat gives you an important clue about the light it can tolerate and where it tends to perform best, though it’s a clue, not the whole picture. Pothos and philodendrons evolved on rainforest floors, filtering light through a dense canopy above them, which is a big part of why they tolerate low light indoors without complaint. Succulents and cacti evolved in open, exposed terrain with little shade, and generally do best in brightly lit spots like a south- or southwest-facing window. Moving a plant well outside the light range its habitat prepared it for, in either direction, tends to cause stress.
Growth stage and season
Growth stage and season affect how a plant responds to light. During active growth, adequate light is especially important for producing new leaves and stems, while many houseplants grow more slowly in winter, and their light demand tends to ease off with it. This isn’t a fixed rule for every species, but it’s a pattern worth watching for.
Leaf characteristics and acclimation
Variegated leaves contain less chlorophyll in their pale areas, and some variegated plants are more sensitive to intense light than their solid-green counterparts. Their ideal exposure varies by species and cultivar, though, so it’s not accurate to say all variegated plants need less direct light; some actually need brighter conditions to maintain strong variegation in the first place. Acclimate any plant gradually to a new light level rather than assuming a category applies uniformly across every variegated variety.
How Do You Know When Your Indoor Plant Actually Needs Repotting?
A plant likely needs repotting when roots grow out of drainage holes, circle the surface of the soil, or the plant wilts quickly after watering despite correct moisture. A visibly pot-bound plant may also stop growing entirely, dry out unusually fast, or push itself upward and out of its container.
Visible Root Signs to Look For
The most obvious signals are physical: roots snaking out of the drainage hole at the bottom of the pot, roots circling the surface of the soil, or a pot that’s visibly bulging or cracked from pressure inside. When the root system outgrows the container, it has nowhere left to go but out.
Growth and Watering Patterns That Signal a Problem
Roots don’t always make themselves visible. Sometimes the signal is behavioral. If the soil dries out unusually fastwithin a day or two of wateringit often means there’s more root mass than soil left in the container. A plant that produces little or no new growth during its active growing season, or one that wilts unusually quickly after watering, can also be showing signs of root restriction.
Waiting until a plant is severely rootbound can make the root ball harder to loosen and increases the care needed during repottingdensely compacted roots take significantly more time to tease apart without causing damage to the underlying structure.
Is a Rootbound Plant Always an Emergency?
Not quite. Some houseplants tolerate being somewhat rootbound better than othersspider plants and peace lilies, for example, can sit in a snug container longer than most without visible distress. But a severely rootbound plant will eventually decline regardless of species. The difference is how much time you have before it becomes urgent.
If two or more of these signs appear together, it’s likely time to give your plant a new home.
What Size and Type of Pot Should You Choose?
For most houseplants, choose a pot only slightly larger than the current oneoften around 1–2 inches wider, though the right increase depends on the plant, its root system, and the existing container. Going much larger than necessary holds more wet soil than the roots can absorb, which increases the risk of root problems.
Repotting Doesn’t Always Mean Going Bigger
Most guides assume you’re always upsizing when you repot. That’s not accurate.
Sometimes the right move is replacing old, depleted, or compacted potting mix while keeping the same container. If the root system isn’t crowded but the soil has broken down losing its structure and drainage capacity after a year or two of use the plant needs fresh soil, not more space. Recognising that distinction before you buy a new pot saves both money and unnecessary stress on the plant.
Why Pot Size Matters More Than You Think
Moving a plant into a much larger pot is a common assumption, but it can create problems by leaving too much wet soil around the roots. A pot that’s much larger than the root system leaves a significant volume of wet potting mix around relatively small roots. That excess moisture dries slowly, limiting oxygen at the root zone and increasing the risk of root problems. University of Minnesota Extension guidance specifically notes that excess soil around roots can hold too much water and create exactly this issue.
Choosing a pot only slightly largeror the same size with fresh mixis one of the most protective decisions a beginner can make.
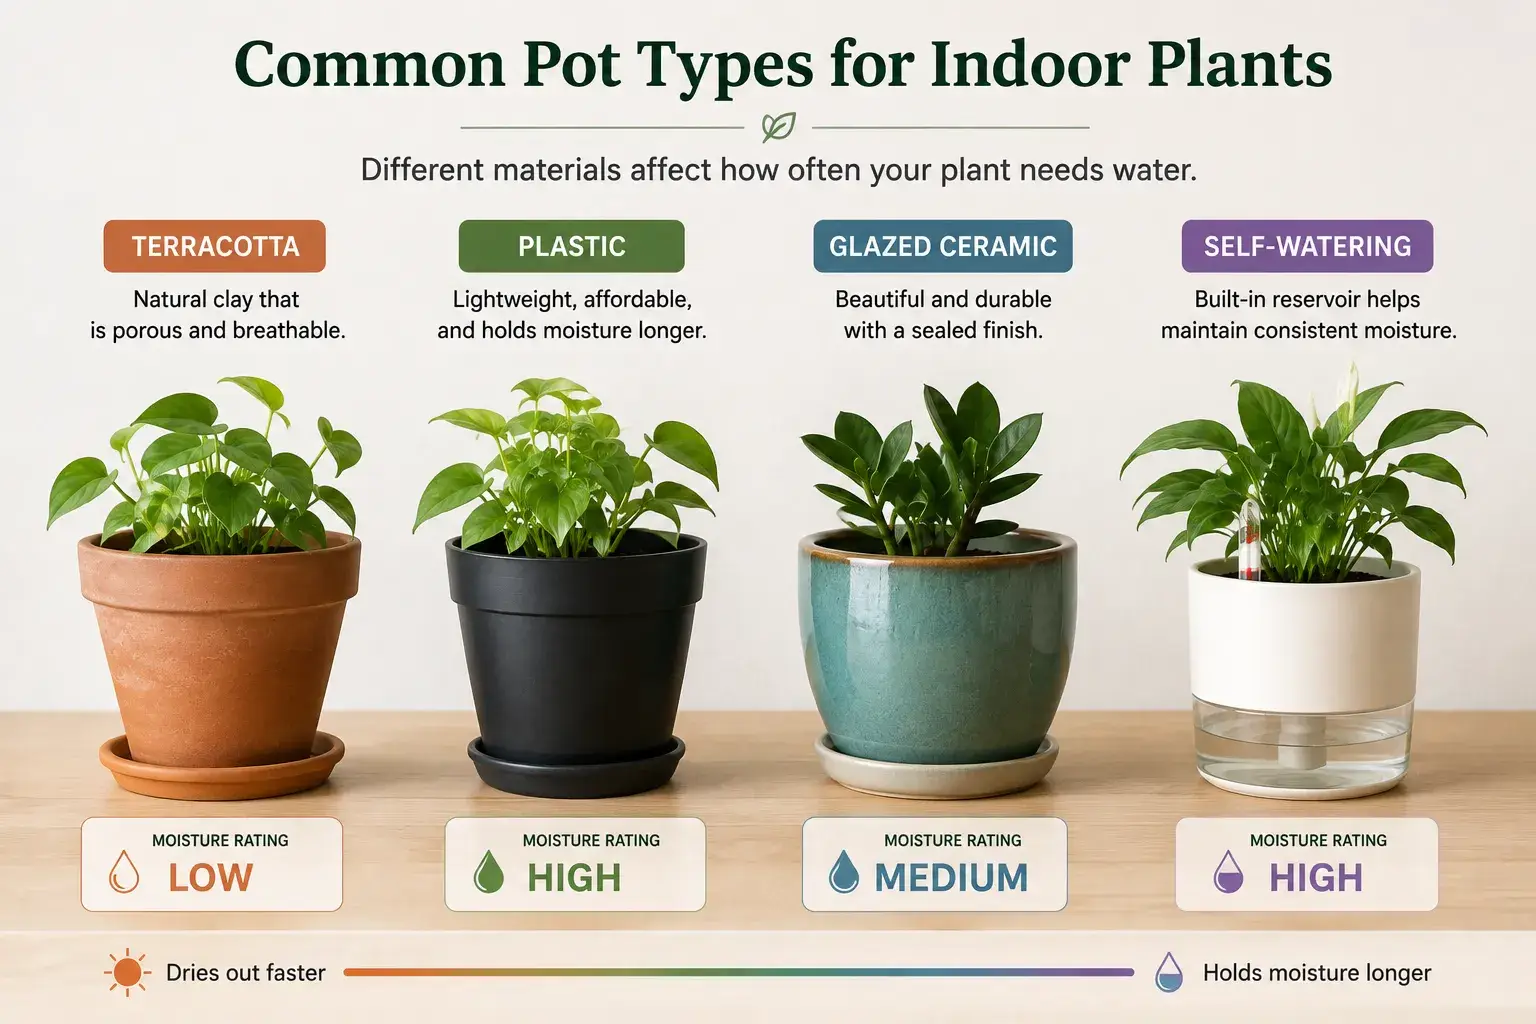
|
Terracotta |
Succulents, cacti, plants prone to overwatering |
Lowdries quickly |
Heavy |
Yes useful for growers who tend to overwater |
|
Plastic |
Moisture-loving tropicals (pothos, peace lily) |
Highretains water longer |
Light |
Yesforgiving |
|
Ceramic / Glazed |
Decorative display; moisture-lovers |
Medium-high |
Heavy |
Yes, if it has a drainage hole |
|
Self-Watering |
Plants that prefer consistently moist conditions |
High |
Medium |
Yes, once watering system is understood |
Does Your New Pot Need a Drainage Hole?
For beginners: always choose a planting pot with a drainage hole. Without one, water has nowhere to go, and you lose the ability to gauge when the soil has been watered thoroughly. If you love a decorative pot without drainage, use it as an outer cachepot set the planted pot inside rather than planting directly into the decorative container. Empty water that collects in the cachepot/saucer. Penn State Extension recommends exactly this approach for situations where aesthetics and drainage need to coexist.
When in doubt, go only slightly larger and choose terracotta if you know you tend to overwater.
When Is the Best Time of Year to Repot Indoor Plants?
Spring through early summer is generally the easiest time to repot most houseplantsactive growth gives roots the momentum to establish quickly in a new container. That said, if a plant has rotting roots, a severely inadequate container, or is in active decline, don’t wait for spring.
Can You Repot in Winter If the Plant Can’t Wait?
Yes repotting can happen at any time of year when conditions require it. University of Minnesota Extension notes that houseplants can be repotted whenever necessary, not just during spring. Recovery may be slower during winter dormancy, so avoid adding unnecessary stress: keep the plant in a consistently warm spot, water carefully, and hold off on fertilizer until active growth resumes. The season is a preference, not a rule.
But what if the plant you’re holding right now came home from the store just last weekand it already looks rootbound? That’s a different question entirely.
What Supplies Do You Need Before You Start?
Before repotting, gather a new pot with drainage holes, fresh potting mix appropriate for your plant, a trowel or old spoon, newspaper or a tarp to catch loose soil, and a watering can. Having everything within reach before you begin prevents the plant from sitting exposed and stressed while you search for something you forgot.
Choosing the Right Potting Mix for Your Plant Type
Choosing the best soil for repotting indoor plants comes down to what you’re growing: succulents and cacti need a gritty, fast-draining mix, while tropical houseplants like pothos or monstera do well in a standard peat or coir-based blend. For a full breakdown by plant category, complete guide to potting soil for indoor plants.
Here’s something most beginner guides skip entirely: you don’t need to remove every bit of old potting mix from the root ball. Focus on loosening densely circling roots and removing any visibly damaged or diseased material, while keeping as much healthy root mass intact as practical. The goal is root health and good contact with fresh soil not a perfectly clean root system. Chasing a perfectly clean root ball can cause unnecessary root breakage. And it isn’t necessary.
Lay out every supply before you start the 10 minutes you spend preparing saves the plant from sitting rootless and exposed while you track down a trowel.
How to Repot an Indoor Plant Step by Step
Water the plant 24 hours before repotting to hydrate the roots without waterlogging the soil. Then remove the plant from its pot, loosen the root ball, inspect and trim any damaged roots, place it at the correct depth in the new container, fill in with fresh soil, and water thoroughly until water drains freely from the bottom. This is how to repot indoor plant:
- Water an hour before repotting Slightly moist soil holds the root ball together better during handling. Dry soil crumbles; waterlogged soil collapses and makes root inspection nearly impossible.
- Prepare the new pot add a layer of fresh potting mix to the base so the plant sits at the right height when placed inside.
- Remove the plant from its current pot tip it sideways and support the base of the stem. Squeeze plastic pots gently to release the root ball. If it’s stuck, gently work around the inside edge with a gardening tool.
- Loosen the root ball use your fingers to gently tease apart compacted roots, especially any circling the base of the root mass. Take your time here. This step causes more damage when rushed than any other.
- Inspect and trim roots if needed remove roots that are visibly damaged or rotting. Healthy roots are generally firm; roots associated with rot are often soft or mushy and may carry an unpleasant smell. Texture and smell are more reliable diagnostics than colour alone, which can vary by species and age. If substantial root rot is present, remove the affected roots cleanly and repot into fresh, well-draining mixbut also correct the underlying cause at the same time. Overwatering or a container with inadequate drainage will produce the same result in the new pot. Repotting treats the symptom. Changing the conditions treats the problem.
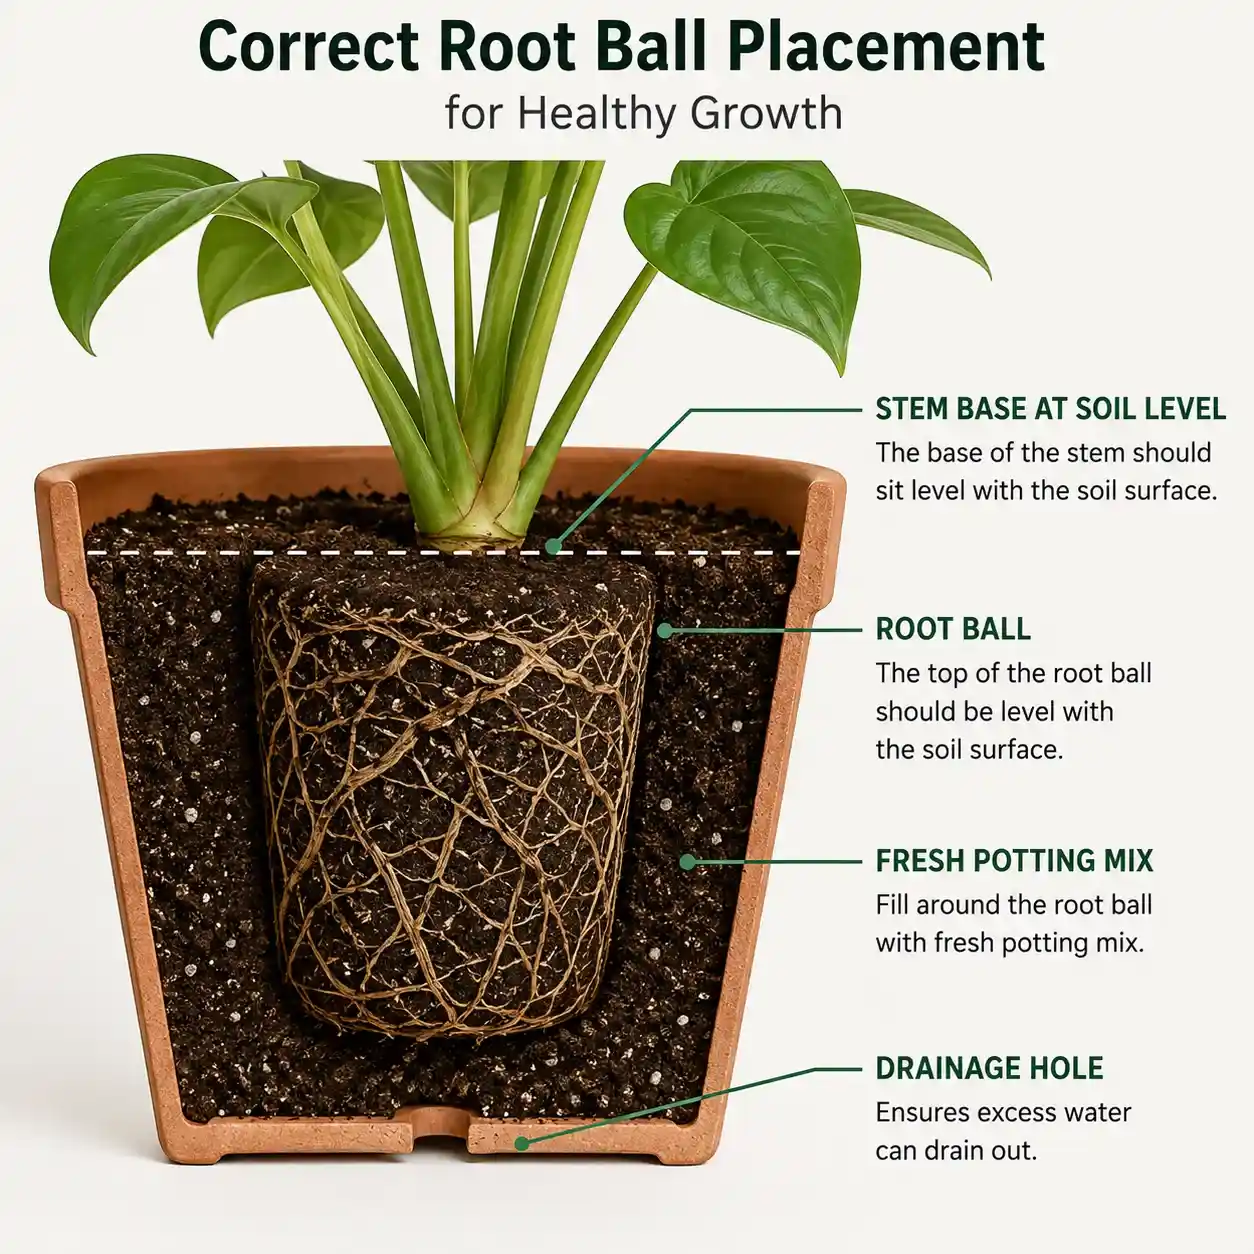
- Set the plant at the correct soil depththe base of the stem should sit at the same level it sat in the old pot. Burying it deeper than it was encourages crown rot.
- Fill in, firm gently, and water thoroughlypress fresh potting mix around the sides to eliminate air pockets. Water until it flows freely from the bottom of the container.
Move slowly through steps 3 and 4. Rushed root loosening causes more damage than anything else in this process.
What Should You Do Right After Repotting?
Water the plant thoroughly immediately after repotting, then place it in its usual spot and avoid direct sun for a few days. Hold off on fertilizing while roots settle into new soil, especially if the fresh potting mix already contains nutrients. Mild drooping in the first week is normal and typically resolves on its own.
Most quality potting mixes already include some level of starter fertilizer. University of Illinois Extension emphasises fertilizing during active growth and cautions that excess fertilizer can damage sensitive, recovering roots. The safer principle: don’t add nutrients until you can see the plant is actively growing again and you know what’s already in the mix.
What Is Transplant Shock and How Long Does It Last?
Transplant shock is the temporary stress a plant experiences after its root system is disturbed. It typically shows as drooping, slight yellowing, or leaf curl none of which are immediate emergencies. Recovery varies by plant and by how much root disturbance occurred during repotting; mild shock often resolves within a week or two, though this isn’t universal across all species and conditions.
The priorities are stable light appropriate for the plant, careful watering, and avoiding unnecessary fertilizer while growth is slow. Don’t move the plant to a new location mid-recovery. Consistent conditions give roots the best chance to re-establish in their new container.
how to water indoor plants the complete beginner’s guide
If the plant is still declining after several weeks of stable care, revisit root condition and pot drainage the problem is most likely pre-existing rather than caused by the repotting itself.
What Are the Biggest Mistakes People Make When Repotting?
The most common repotting mistakes are choosing a pot that’s far too large, fertilizing before roots have had time to settle, repotting when the plant doesn’t actually need it, and stripping the entire root ball of old soil unnecessarily. Each one adds stress at exactly the moment the plant needs stability most.
Choosing a Pot That’s Far Too Large
Covered in the pot selection section above: a much larger pot holds excess moisture around a small root system, limiting oxygen at the root zone. Choose a pot only slightly larger, rather than jumping several sizes..
Fertilizing Before Roots Have Settled
Fresh potting mix typically contains nutrients already. Adding fertilizer immediately can be unnecessary, especially when the fresh mix already contains nutrients, and excessive fertilizer can damage roots. Resume fertilizing based on active growth signals and the nutrient content of your mixnot a fixed number of weeks.
Repotting When the Plant Doesn’t Need It
Repotting a healthy plant for its own sake is unnecessary stress. Always check root condition and soil quality first. If the roots aren’t crowded and the soil still drains and holds structure, leave it alone.
Stripping All the Old Soil Unnecessarily
As outlined in the supplies section: keep healthy root mass intact. The goal is fresh soil contact and removal of damaged materialnot a clean root system for its own sake. Cross-reference the practitioner detail in H2 4 before you start.
Every one of these mistakes is avoidable with the prep work above. Most of them disappear if you take five minutes to assess the plant before you touch anything.
Do You Need to Repot a Plant Right After Buying It?
Not automatically. Check the roots, potting mix, drainage, and plant condition first. If everything looks healthy, giving the plant time to acclimate before repotting reduces the number of simultaneous changes it has to manage. But if the roots are severely crowded or the mix is poor, repot when you see the signsnot on a schedule.
A newly purchased plant is already adjusting to a different light level, humidity, and temperature than it came from. Adding root disturbance on top of that environmental shift isn’t wrongbut it’s worth asking whether it’s necessary right now. University of Minnesota Extension notes that repotting at purchase is appropriate when needed, but that assessing conditions first is always the right starting point.
When Is It Worth Repotting a New Plant Right Away?
Repot promptly if: roots are already escaping the pot at purchase, the potting mix has obviously poor drainage, the plant shows signs of root rot, or the container is damaged. In those cases, waiting doesn’t helpthe plant is already under stress and a fresh container is part of the solution.
If the plant looks healthy and the soil drains well, a period of acclimation before repotting can help. If the roots or soil are already a problem, act on what you see.