
7 Reasons Why Indoor Plant Leaves Turn Yellow And How to Fix Each One
It started with one leaf. A single golden leaf on your otherwise thriving pothos. You picked it off and thought nothing of it. Then two more turned yellow the next week.
Why are your indoor plant leaves turning yellow all of a sudden?
The direct answer is that yellowing usually points to a problem with watering, roots, nutrients, light, pests, temperature, humidity, or natural aging. The important part is identifying which pattern your plant is showing. Yellowing at the tips means something different from yellowing between green veins, and soft yellow leaves suggest a different problem from crispy ones.
That pattern is the shortcut. Find it first, then fix the cause.
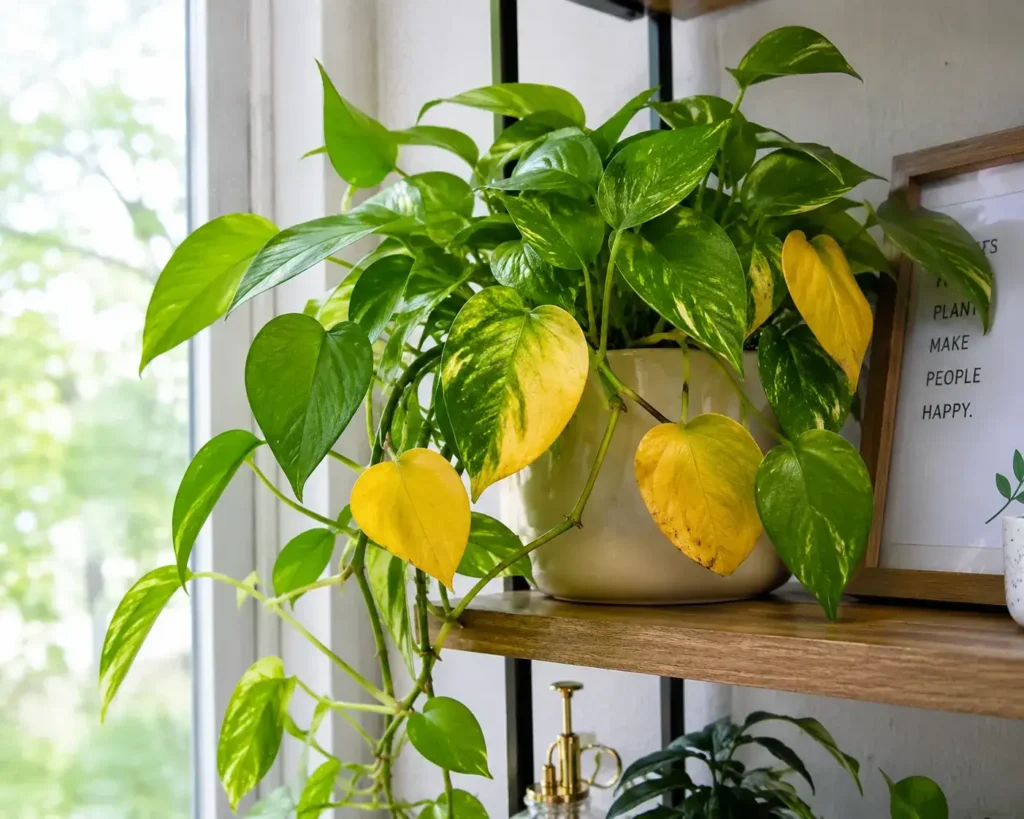
Quick Diagnostic Table: What Your Yellow Leaves Are Telling You
Before changing anything, look at the leaf pattern, the soil, and which part of the plant is affected. This quick guide helps narrow down the likely cause of plant leaves turning yellow without jumping straight to fertilizer, more water, or a new pot.
| What you see | Most likely cause | First thing to check |
| Yellow lower leaves with wet soil | Overwatering or poor root health | Soil moisture and roots |
| Yellow, crispy tips and edges | Underwatering, dry air, or mineral buildup | Soil moisture and water quality |
| Yellow tissue between green veins | Nutrient-related chlorosis | New vs. old leaves and soil conditions |
| Older leaves turning uniformly yellow | Nitrogen deficiency or root stress | Feeding history and roots |
| Fine yellow stippling with webbing | Spider mites | Leaf undersides |
| Yellowing after repotting | Transplant stress | Root disturbance and moisture |
| Yellowing with brown patches | Light, temperature, watering, or disease stress | Location and pattern of damage |
The table gives a starting point, not a final diagnosis. The Royal Horticultural Society makes the same broader point in its houseplant guidance. Yellowing can have many causes, so the position and pattern of the damage matter.
If the plant has yellow leaves on plants that appeared one at a time over months, that’s a very different situation from 5 leaves changing color in a single week.
Understanding Chlorosis: The Science Behind Yellow Leaves
Chlorosis is simply the term for yellowing of plant leaves. It happens when leaves lose enough chlorophyll to reveal the yellow pigments beneath, and the cause can range from nutrient problems to water stress, poor light, pests, disease, or natural aging.
Chlorophyll is the green pigment that lets leaves capture light for photosynthesis. When chlorophyll production falls or chlorophyll breaks down, the leaf becomes pale or yellow.
This is why yellowing of leaves isn’t a diagnosis by itself. It’s a symptom.
The pattern provides the clue.
If the whole older leaf turns yellow, nitrogen deficiency becomes more plausible. If the tissue between green veins turns yellow on young leaves, iron deficiency becomes more plausible. If several leaves turn yellow while the soil stays saturated, the roots deserve attention before the fertilizer shelf does.
That’s the key idea behind this entire guide.
Reason #1: Overwatering and Root Problems
Overwatering can cause yellow leaves because saturated potting mix pushes air out of the root zone, reducing the oxygen roots need to function. The result can be poor water uptake, nutrient problems, root damage, yellowing, and eventually leaf drop.
Why Overwatering Causes Yellow Leaves
Roots don’t just need water. They need air around them too.
When a pot stays saturated, those air spaces fill with water. Prolonged waterlogging can damage roots, which then struggle to supply the foliage with water and nutrients.
This creates one of the most confusing plant symptoms. The soil is wet, yet the plant may look thirsty.
That’s why overwatered yellow leaves can appear alongside wilting.
The RHS specifically lists yellowing and leaf drop among signs associated with overwatering, along with dark, mushy roots and other symptoms of poor root health.
How to Tell If Overwatering Is the Problem
Look for several clues together:
- Yellow leaves feel soft rather than crisp.
- Soil stays wet for an unusually long time.
- The pot feels heavy.
- Water collects in the saucer.
- Roots are dark, soft, or damaged.
- Older and newer leaves may yellow together.
- A sour smell can indicate a poorly aerated root zone.
Don’t diagnose overwatering from yellow leaves alone. Check the soil.
The RHS recommends checking moisture below the surface instead of watering on a fixed routine. It also stresses that containers need drainage because roots need access to air.
The Fix
- Check the soil several centimetres below the surface.
- Inspect the roots if the soil remains saturated.
- Remove badly damaged roots with clean scissors.
- Repot into suitable fresh mix if the root zone is compromised.
- Confirm that the container has an open drainage hole.
- Water again only when the plant actually needs it.
A common mistake is repotting without checking the roots. If damaged roots remain in a persistently wet root zone, the underlying problem hasn’t really been fixed.
Healthy roots should feel firm. Severely rotted roots may be dark and mushy. RHS recommends lifting a struggling houseplant from its container when necessary because root inspection can reveal problems that aren’t visible from above.
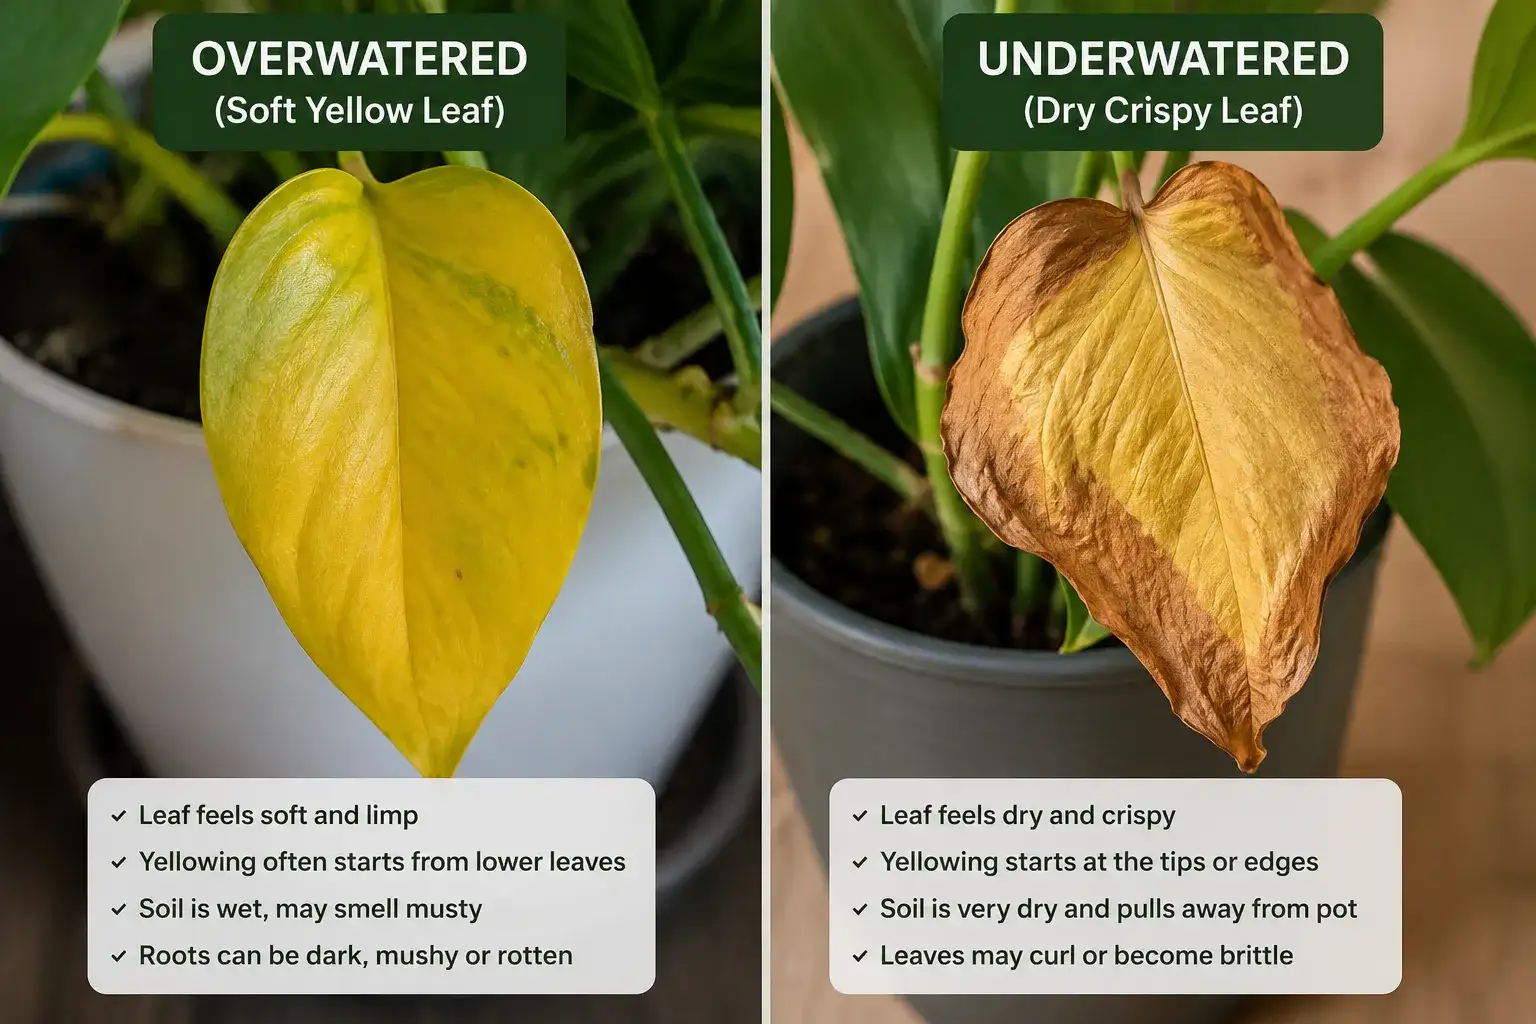
Overwatering vs. Underwatering
These problems are often confused because both can cause yellowing and wilting.
| Sign | Overwatering | Underwatering |
| Leaf texture | Soft, limp | Dry, crisp, brittle |
| Soil | Persistently wet | Very dry |
| Pot weight | Heavy | Light |
| Root condition | Dark or damaged | Dry or stressed |
| Typical progression | Yellowing and drop | Yellowing, browning, curling |
Pattern claim: Newer plant owners often water on a calendar because watering feels like the clearest way to care for a plant. The problem is that plants don’t use water at a fixed rate. Light, temperature, season, pot size, and root health all change how quickly a container dries.
That distinction matters more than the watering schedule printed on a generic care card.
Reason #2: Underwatering and Water Stress
Underwatering can cause plant leaves turning yellow at tips and edges, especially when the soil becomes very dry and the plant cannot replace water lost through its leaves. The damaged areas often become brown and crispy as dehydration continues.
Signs of Underwatering
Check for this combination:
- Yellowing begins around tips or margins.
- Leaf edges become brown and crisp.
- Leaves curl or droop.
- Soil feels dry several centimetres down.
- The pot feels unusually light.
- The plant may wilt quickly after missing a watering.
If someone searches for indoor plant leaves turning yellow and brown, the yellow-to-brown progression is an important clue. Yellowing shows stress, while brown tissue has progressed to dead tissue.
But don’t assume every brown tip means thirst.
Dry air and water quality can produce similar damage.
How to Water Correctly
- Check the soil below the surface.
- Water thoroughly when the plant needs it.
- Allow excess water to drain freely.
- Empty any standing water from the saucer.
- Adjust frequency as light and temperature change.
The finger test is more useful than a fixed weekly schedule. The RHS recommends checking moisture before watering because plants dry at different rates depending on conditions.
Don’t Ignore Water Quality
Water quality can matter for sensitive houseplants.
The RHS notes that hard water is alkaline and that prolonged exposure to some tap-water conditions can contribute to problems in sensitive plants. It specifically notes fluoride can accumulate and become toxic to some plants, while chlorine can be harmful to some species.
So if watering appears correct but sensitive plants repeatedly develop damaged tips, consider the water source rather than simply adding more fertilizer.
Reason #3: Nutrient Deficiencies
Yellowing of leaves is due to deficiency of a specific nutrient in some cases, but the pattern matters more than the color alone. Nitrogen deficiency tends to cause broader yellowing on older leaves, while iron deficiency commonly affects younger leaves and can produce yellow tissue between green veins.
Nitrogen Deficiency
Nitrogen is mobile inside plants.
When supplies become limited, a plant can move nitrogen away from older leaves and toward newer growth. The older leaves therefore lose green color first.
The pattern is usually fairly broad rather than a few isolated yellow spots.
Iron Deficiency and Chlorosis
Iron behaves differently.
Iron deficiency commonly appears on younger leaves, with the tissue between veins turning yellow while the veins remain greener. This is called interveinal chlorosis.
And here’s the part many quick plant-care guides skip. A plant can show an iron-deficiency pattern even when the soil contains iron, because soil conditions can make nutrients less available to roots.
That means blindly adding more iron isn’t always the answer.
Magnesium Deficiency
Magnesium deficiency can produce interveinal yellowing too, but the affected leaves tend to be older rather than the newest growth. That old-versus-new distinction is useful when separating magnesium from iron deficiency.
The Fertilizer Mistake
Most people reach for fertilizer the moment they see yellow leaves.
That’s often the wrong first move.
The assumption that yellowing of leaves is due to deficiency of nutrients is one of the easiest diagnoses to overuse. Waterlogging, drought, poor light, root stress, and poor establishment can all resemble nutrient deficiency. The RHS specifically warns that growing-condition problems can mimic nutrient deficiencies.
So check the roots, water, light, and leaf pattern before feeding.
Reason #4: Light Problems, Too Much or Too Little
Indoor plant leaves turning yellow can result from either insufficient or excessive light, but the patterns differ. Low light can slow growth and contribute to gradual yellowing, while excessive direct light can bleach or scorch foliage, especially when the plant suddenly moves into stronger sun.
Signs of Too Little Light
Watch for:
- Slow, stretched growth.
- Long gaps between leaves.
- Smaller new leaves.
- Lower leaves gradually yellowing.
- Soil remaining wet longer because the plant uses water more slowly.
A useful seasonal clue is often missed.
A window that worked in June may not provide the same usable light in December. Shorter days, lower sun angles, curtains, and seasonal weather can change the plant’s growing conditions without anyone moving the pot.
Signs of Too Much Light
Excessive direct light tends to produce damage on the surfaces facing the light source.
Look for:
- Pale or bleached foliage.
- Yellow patches on exposed leaves.
- Brown, crispy areas.
- Damage appearing after a move to stronger sunlight.
A Simple Light Test
At midday, hold a hand between the plant and its main light source.
A strong, sharp shadow suggests stronger direct light. A soft shadow suggests more diffuse light. A barely visible shadow suggests low light.
The right level still depends on the species. A pothos and a cactus shouldn’t be judged by the same light standard.
Reason #5: Pest Infestations
Pests can cause yellow leaves on plants by feeding on leaf tissue, draining sap, or damaging roots. Spider mites often create fine yellow stippling and webbing, while mealybugs and scale insects leave visible signs on stems and leaf undersides.
Spider Mites
Spider mites feed on individual plant cells, leaving many tiny pale or yellow marks across the leaf.
Look underneath leaves.
Fine webbing around leaf joints is another clue. The RHS identifies fine webbing and straw-colored speckling as characteristic signs of red spider mite activity.
A magnifying glass helps because individual mites are tiny.
Fungus Gnats
Fungus gnats look like tiny black flies around potting mix.
Their presence often tells a bigger story. The soil has probably stayed moist enough to support their life cycle.
The flies themselves aren’t automatically proof that they caused the yellow leaves. Persistent wet soil may be the more important clue because poor root conditions can cause yellowing.
Mealybugs and Scale
Mealybugs can appear as cottony white masses around stems and leaf joints.
Scale insects look more like small bumps attached to plant tissue. The RHS lists both as common houseplant pests and recommends looking at stems and the undersides of leaves.
What to Do
- Isolate the affected plant from nearby plants.
- Inspect leaf undersides, stems, and new growth.
- Remove visible pests where practical.
- Repeat suitable control measures according to the product label.
- Monitor the plant regularly for returning pests.
For chemical control, follow the product label and local rules. The RHS favors non-chemical and biological controls where practical.
Reason #6: Environmental Stress, Temperature, Humidity, and Drafts
Environmental stress can make indoor plant leaves turning yellow and brown, particularly after sudden changes in temperature, humidity, or light. Cold drafts, heating vents, very dry air, and excessive heat can all stress foliage, with tropical plants often showing damage first.
Cold Drafts and Temperature Changes
Check the plant’s position.
Is it beside an exterior door, drafty window, air-conditioning outlet, or another location where temperatures change quickly?
A useful clue is uneven damage. If the leaves closest to the draft suffer while protected foliage remains healthy, the environment becomes a stronger suspect.
Dry Air
Heating can reduce indoor humidity.
Plants that evolved in humid environments may respond with brown or yellow leaf edges when moisture loss from the foliage outpaces what the roots can replace.
The RHS notes that low humidity can increase water loss from leaves and that many tropical houseplants prefer higher humidity.
Heat Stress
Very hot locations can produce wilting, rolling, bleaching, crispy foliage, and leaf loss.
Radiators, heating vents, and hot sunny glass can create small heat zones even when the rest of the room feels comfortable.
Move the plant first. Treat the symptom second.
Better Humidity Habits
For humidity-sensitive plants:
- Group compatible plants together.
- Keep them away from heating vents.
- Use a humidifier when indoor air becomes very dry.
- Improve airflow so foliage doesn’t stay constantly damp.
Misting can raise humidity briefly, but it isn’t a substitute for changing an extremely dry room.
Reason #7: Root-Bound Conditions and Transplant Shock
Root-bound plants can struggle to absorb water evenly when roots become heavily congested, while transplant shock can temporarily stress a plant after its roots are disturbed. Yellowing and leaf drop can follow, especially when the plant is already dealing with poor light, damaged roots, or watering problems.
Signs a Plant Is Root-Bound
Look for:
- Roots emerging from drainage holes.
- Roots circling densely around the root ball.
- Water running through the pot unusually quickly.
- Soil drying much faster than before.
- Growth slowing despite otherwise good care.
RHS recommends lifting a plant from its container when necessary because a mass of circling roots can reveal congestion that isn’t visible from the surface.
How to Repot
- Choose a container suited to the plant and root system.
- Lift the plant gently from its existing pot.
- Inspect the root ball for congestion or damage.
- Loosen congested roots carefully where appropriate.
- Refresh the growing medium with a suitable mix.
- Water thoroughly and let excess moisture drain away.
Don’t automatically jump to a huge pot.
A much larger container can hold more moisture than the plant’s root system can use. The RHS recommends choosing container size based on the plant and its growth needs rather than simply giving a struggling plant the biggest pot available.
Transplant Shock
Some leaf loss after repotting can happen because the root system has been disturbed.
The important question is what happens next.
If new growth remains healthy and the plant stabilizes, the yellow leaves may simply be the damaged foliage being shed. If yellowing continues across new growth, reassess watering, light, roots, and pests rather than assuming the plant is still “adjusting.”
Natural Aging vs. Problem Yellowing: How to Tell the Difference
Yellow leaves on plants are not automatically a sign of disease or poor care. An occasional oldest leaf can naturally yellow and fall as the plant ages, while widespread or rapidly progressing yellowing usually deserves investigation.
The pattern is what matters.
Natural aging: one of the oldest lower leaves slowly changes color while the rest of the plant remains healthy.
Possible problem: several leaves yellow together, new growth becomes pale, or yellowing appears alongside wilting, brown patches, root problems, or pests.
The pace matters too.
A single old leaf disappearing occasionally is very different from 5 leaves changing color within days.
That distinction can prevent unnecessary repotting, fertilizing, and watering changes.
Recovery Timeline: What to Expect After Fixing the Cause
Knowing how to cure yellow leaves on plants requires realistic expectations. The damaged leaf usually isn’t the best measure of recovery because severely yellow tissue may not regain its original color. A better signal is stable growth and the appearance of healthy new foliage.
Think of recovery in stages:
- Stop the cause. Correct the watering, light, pest, root, or environmental problem.
- Stabilize conditions. Avoid making several major changes at once.
- Watch new growth. New leaves reveal whether the plant is recovering.
- Remove dead foliage. Completely yellow or brown leaves won’t return to normal.
- Reassess gradually. If new growth remains damaged, investigate again.
The RHS advises removing completely yellow or brown leaves because they won’t recover, while predominantly green leaves can still be worth retaining.
This is one reason people sometimes think a treatment “didn’t work.” They fix the cause, then stare at the old yellow leaf waiting for it to turn green.
It won’t.
The new growth is the scoreboard.
When Yellow Leaves Are Beyond Saving
There is a point where how to fix yellow leaves on indoor plants becomes less about saving every leaf and more about preserving healthy tissue. Extensive root rot, widespread stem damage, severe leaf loss, or continuing decline despite corrected conditions can make recovery difficult.
At that stage, inspect the plant for healthy stems and nodes.
If viable sections remain, propagation can provide a second chance. Stem cuttings can sometimes produce new plants even when the original root system is badly compromised.
But don’t rush to throw away a plant simply because it has lost several leaves.
A plant with healthy roots and firm stems can look surprisingly bare and still recover after its conditions improve.
Which raises a more useful question: is the goal to save every damaged leaf, or to get the plant growing well again?
Those aren’t always the same goal.
Frequently Asked Questions
Prevention Checklist: Keeping Your Indoor Plants Green
The easiest way to prevent indoor plant leaves turning yellow is to catch changes before the foliage shows obvious damage.
Watering
- Check soil moisture before watering.
- Make sure drainage holes remain open.
- Empty standing water after watering.
- Adjust frequency when light and temperature change.
Light
- Reassess window placement as seasons change.
- Watch for stretched growth in low light.
- Watch for bleaching or scorch in strong direct sun.
Environment
- Keep plants away from heating vents and cold drafts.
- Give humidity-sensitive plants suitable conditions.
- Avoid sudden moves between very different environments.
Pests
- Inspect leaf undersides regularly.
- Check stems and new growth.
- Isolate suspicious plants early.
Roots and Feeding
- Watch for roots emerging from drainage holes.
- Repot when the root system becomes congested.
- Diagnose yellowing before reaching for fertilizer.
A good plant-care routine isn’t about doing more. It’s about noticing the right signal before reacting to it.