
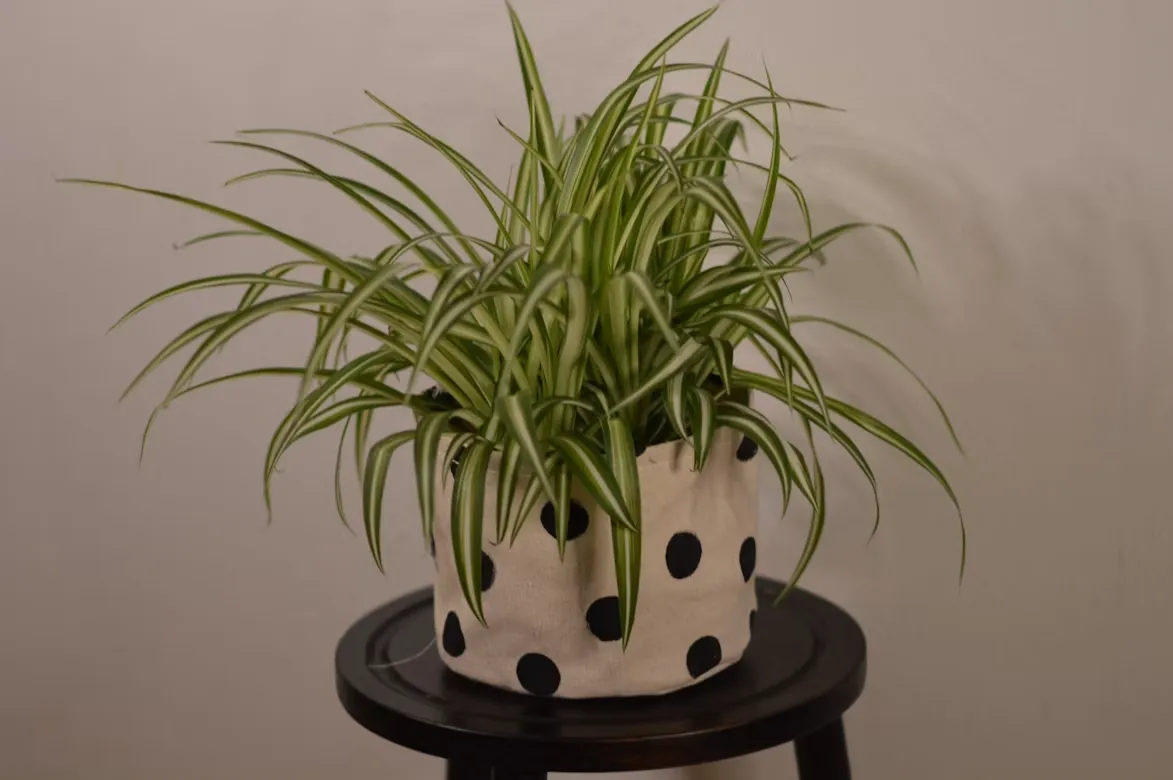
Spider Plant Care Guide: How to Grow Healthy, Thriving Chlorophytum comosum Plants
Brown tips appear. You Google the fix. Every article says the same thing: add more humidity. So you mist the leaves, set up a pebble tray and the tips keep browning anyway.
Spider plant care comes down to bright indirect light, proper drainage, and watering when the soil calls for it rather than on a fixed weekly schedule. Get those three right, and Chlorophytum comosum practically looks after itself. This spider plant care guide covers the full picture: watering mechanics, accurate brown-tip diagnosis, propagation, seasonal care, and the tap water question, including a testing method most guides won’t give you.
Spider Plant Facts: What Is a Spider Plant?
Spider plants are adaptable, fast-growing houseplants native to the coastal regions of tropical South Africa. The spider plant’s scientific name is Chlorophytum comosum, and it belongs to the family Asparagaceae. The species has been reclassified several times across older taxa historically grouped with the genera Hartwegia and Hollia, but Chlorophytum comosum is the current accepted name. Mature foliage spans roughly 12–24 inches across, with trailing stems reaching 2–3 feet when healthy.
Botanical name, family, and common names
Common names include airplane plant, spider ivy, ribbon plant, and common spider plant, all referring to the same species. Individual leaves have a characteristic complex structure: long and arching, with a central stripe or contrasting leaf margins depending on the cultivar. Garden centers sell these plants under any of those names interchangeably, so don’t let the labelling confuse you.
Where are spider plants native to?
Coastal tropical South Africa. That origin explains their indoor resilience; these plants evolved through variable light conditions and seasonal moisture swings, not stable greenhouse environments. That’s why they handle missed waterings better than most houseplants, and why they’re genuinely forgiving of imperfect care.
Are spider plants easy to grow?
Yes, but “easy” isn’t the same as impossible to damage. Spider plants tolerate imperfect conditions better than most species, but watering mechanics, drainage, and water quality still determine whether yours thrives or develops persistent problems. Beginner-friendly doesn’t mean care-free.
One spider plant benefit worth stating accurately: the link between spider plants, indoor air cleaning, and human health. NASA’s 1989 Clean Air Study did identify Chlorophytum comosum among species that may reduce certain VOCs indoors. Real-world filtration in a typical home is modest; a few plants won’t meaningfully filter a room, but the contribution is real alongside proper ventilation.
How Do You Care for a Spider Plant Indoors?
Good spider plant indoor care is condition-based, not calendar-based. The plant signals when it needs water; the soil tells you whether drainage is working; new growth tells you whether your care approach is landing correctly. Airplane plant care follows this same framework: read the plant and respond to actual conditions; don’t follow a rigid schedule that ignores what’s happening in the pot. These principles are at the heart of effective spider plant care indoors.
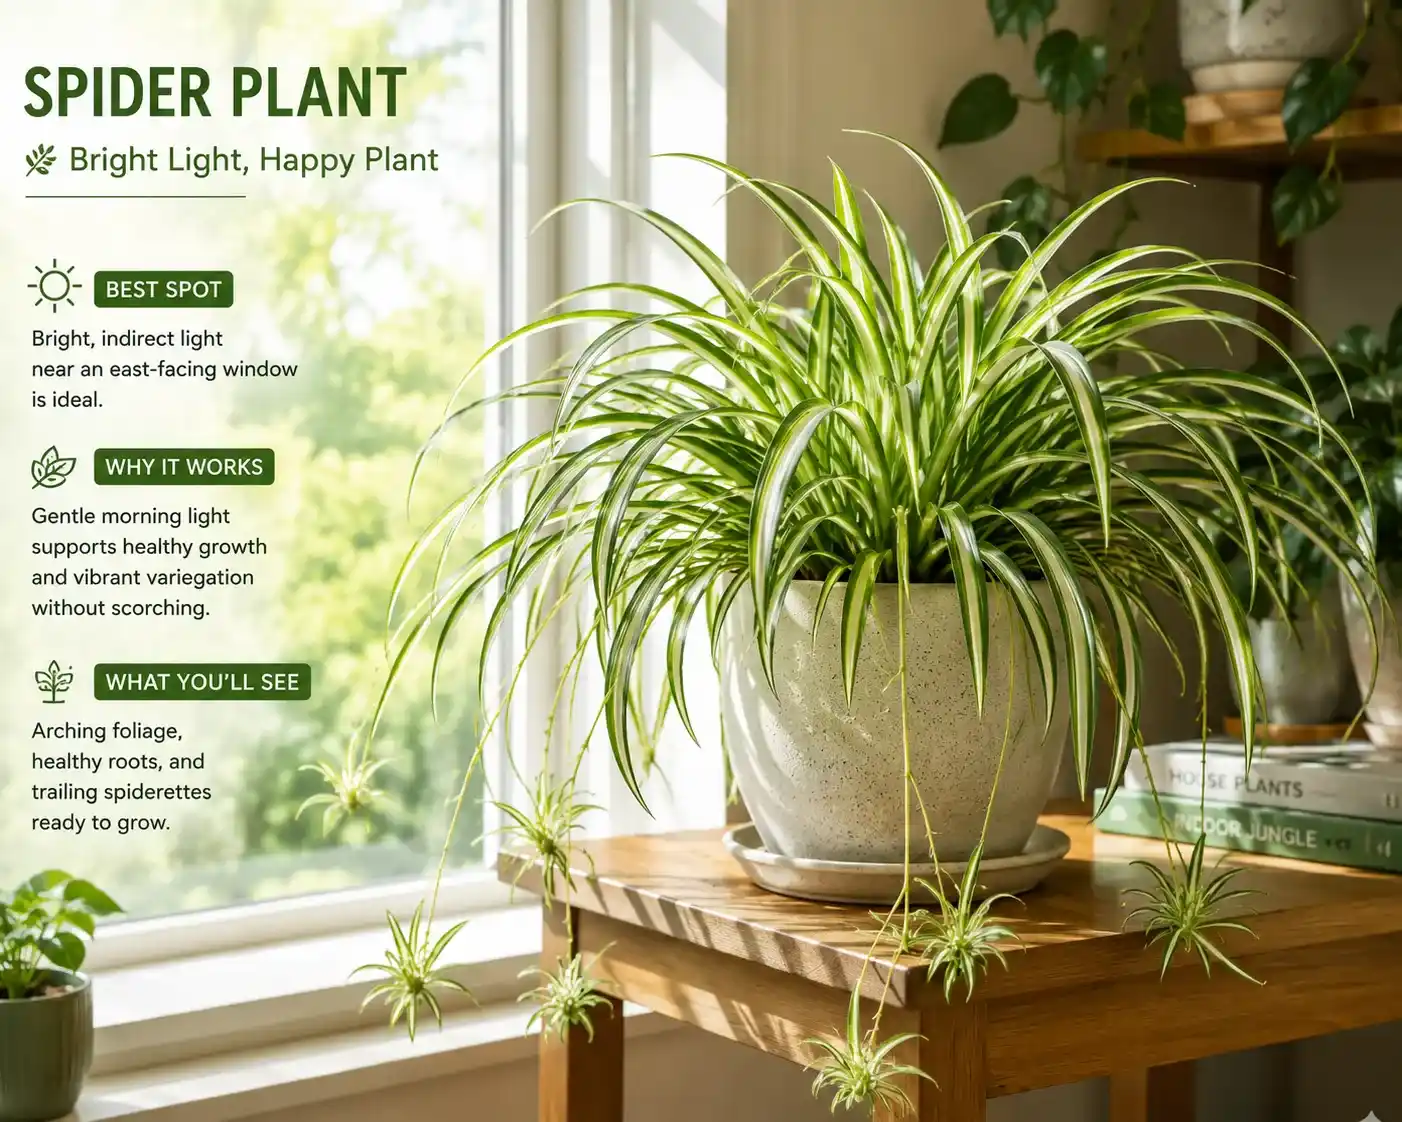
How much sunlight does a spider plant need?
Bright indirect light. In practice, that means within 3–5 feet of a window that doesn’t receive harsh afternoon sun. An east-facing window with gentle morning light is close to ideal. South and west-facing windows in summer push the intensity into the scorching range; direct sun bleaches foliage and accelerates tip browning. Variegated cultivars, those with distinct leaf margins, need slightly more light than solid green types to hold their colouring. If the stripes start fading, the plant needs a brighter spot.
How often should you water a spider plant?
Spider plant care watering works best when it’s responsive rather than scheduled. Check the top inch of soil: if it’s dry, water; if it’s still moist, wait. When you do water, water thoroughly until it runs freely from the drainage holes, then let the excess drain completely. Never leave the pot sitting in a saucer of standing water.
How often that cycle repeats varies by setup. A small terracotta pot under bright summer light may need water every 4–5 days. The same plant in a large plastic container in a shadier corner could go 12–14 days. Adjust for your actual conditions.
Overwatered vs underwatered spider plant
| Symptom | Overwatered | Underwatered |
| Soil | Wet, slow to dry, sometimes malodorous | Dry, pulling away from pot edges |
| Leaves | Soft, yellowing, mushy near base | Limp, thin, may crisp at tips |
| Roots | Brown, mushy, sour smell | Dry, white or tan, firm |
| Leaf tips | May brown | May brown |
That last row is the one that matters most. Tip browning appears in both conditions, which is exactly why diagnosing from tips alone leads to the wrong fix every time.
What soil is best for spider plants?
A light, airy mix that drains quickly. A ratio of roughly 2 parts standard indoor potting mix to 1 part perlite gives good drainage without sacrificing moisture retention. Target soil pH around 6.0–6.5; most commercial mixes fall naturally in this range. Drainage quality matters more than ingredient precision; compacted, waterlogged soil causes far more damage than a slightly imperfect mix ratio.
What temperature and humidity do spider plants need?
Normal indoor temperatures between 60–80°F (15–27°C) cover the comfortable range. Keep the plant away from cold window drafts, heating vents, and air conditioning units blowing directly on the foliage. All three create localised stress the plant can’t adapt to quickly.
Humidity around 40–60% is comfortable. Spider plants tolerate typical indoor humidity (often 30–50%) without significant problems, so humidity is rarely the first thing to adjust when something goes wrong.
Ideal humidity and ways to increase it
Feed during active growth, roughly March through September, with a balanced liquid fertilizer diluted to half strength, once per month. A 10-10-10 NPK ratio works well. Skip feeding entirely in winter. Salt buildup from excess or year-round fertilizer is a more common cause of tip browning than most growers realise. Less is genuinely more with spider plants.
How should you fertilize a spider plant?
Feed during active growth, roughly March through September, with a balanced liquid fertilizer diluted to half strength, once per month. A 10-10-10 NPK ratio works well. Skip feeding entirely in winter. Salt buildup from excess or year-round fertilizer is a more common cause of tip browning than most growers realise. Less is genuinely more with spider plants.
How do you prune a spider plant?
Spider plant care pruning is straightforward: remove dead or damaged leaves at the base using clean scissors. For cosmetic purposes, trim individual brown tips by cutting just inside the discoloured area at a slight angle. That said, trimming tips doesn’t address the underlying cause; it just makes the damage less visible while the problem continues. Regularly removing yellowing or heavily damaged foliage also improves air circulation through the plant.
How do you make a spider plant bushier?
Light drives foliage density more than pruning does. A plant in good indirect light produces noticeably denser growth than one in lower light, no matter how often you cut it back. Rotate the pot a quarter turn weekly so all sides receive even exposure. Consistent care over a full growing season, not any single intervention, produces fuller plants.
When should you repot a spider plant?
Repot when roots crowd the pot significantly, when drainage slows despite clear holes, or when the plant becomes top-heavy and unstable. Root-bound plants show thick, circling roots that have displaced most of the soil and may push through drainage holes.
Does pot type matter?
Terracotta dries faster than plastic, which is useful if you tend to overwater, since faster drying reduces rot risk. Plastic retains moisture longer, so you water less often but need to pay closer attention to drainage. Drainage holes are non-negotiable in either material.
How do you repot a spider plant?
- Choose a pot one size up with clear drainage holes.
- Water lightly a day before repotting to reduce transplant stress.
- Remove the plant and gently loosen the root ball.
- Inspect roots; trim any brown, mushy, or dead sections cleanly.
- Add fresh growing medium to the new pot.
- Replant at the same depth, filling gaps with fresh mix.
- Water lightly, then return it to the plant’s usual light position.
Should you cut spider plant babies off?
Spider plant babies, the small rosettes that dangle at the ends of trailing stems spiderettes can stay attached or be removed depending on your goals. They don’t meaningfully harm the mother plant when left on. Remove them when you want to propagate or when the display gets unwieldy. Keep them if the cascading look is the point.
Spider Plant Care: Indoor or Outdoor Which Is Better?
Spider plants can grow successfully indoors or outdoors when the growing conditions are right. Light, temperature, watering, and protection from extreme weather all play an important role in keeping the plant healthy.
When deciding between indoor and outdoor care, growing a spider plant indoors gives you more control over temperature, watering, and light exposure. Outdoors, spider plants can thrive during warm weather when they are placed in bright shade or filtered light.
If you move your spider plant outside, introduce it to the new light conditions gradually. Sudden exposure to strong sunlight can scorch the leaves. When temperatures start to drop, move the plant back indoors before frost or freezing weather becomes a concern.
Spider Plant Care Outside
Spider plants do well outside when they are placed in bright indirect light, filtered sunlight, or partial shade. Avoid locations that receive intense midday or afternoon sunlight, particularly during hot weather.
Outdoor plants may need watering more often because heat, wind, and sunlight can cause the soil to dry faster. Even so, allow the soil to dry slightly between waterings and make sure the pot has good drainage.
If the weather becomes too cold, bring the spider plant indoors. These plants prefer warm conditions and can be damaged by freezing temperatures.
Brown Tips on Spider Plants: Causes and Solutions
Brown leaf tips are one of the most common problems spider plant owners encounter. Before changing the plant’s humidity, it is important to find out what is actually causing the browning.
Several factors can lead to brown tips, including inconsistent watering, fertilizer salt buildup, fluoride or mineral accumulation in tap water, very low humidity, excessive light, and root stress.
Start by checking the soil. If it is extremely dry, the plant may need a more consistent watering routine. If the soil stays wet for long periods, however, the roots can become stressed or damaged.
Dry indoor air can contribute to brown tips, but humidity is not always the main problem. Check watering, drainage, fertilizer use, and water quality before assuming the plant simply needs more moisture in the air.
You can trim brown leaf tips with clean scissors to improve the plant’s appearance. Keep in mind that trimming only removes the visible damage. To prevent new brown tips from developing, you need to correct the underlying cause.
Could Fluoride or Water Chemistry Cause Brown Tips?
Spider plants can be sensitive to fluoride, which may accumulate in leaf tissue over repeated waterings and eventually cause browning along the leaf margins and tips. This is different from chlorine. Chlorine can dissipate when tap water is left standing for about 24 hours, while fluoride does not evaporate.
Can Over-Fertilizing Cause Brown Tips?
Yes. Using too much fertilizer or feeding too frequently can lead to salt buildup in the soil. This can interfere with the roots’ ability to take up water and may cause brown tips and damaged leaf margins.
If you have been using fertilizer at full strength or feeding throughout winter, reduce the amount and flush the soil thoroughly with plain water to help remove accumulated salts.
Spider Plant Care in Water
Growing spider plant babies in water is a simple way to propagate a mature plant. Spiderettes can develop roots in water before they are moved into soil.
Choose a healthy spiderette with visible root nubs and place its base in a clean container of water. Keep the leaves above the water rather than submerging the entire plant.
Place the container in bright indirect light and change the water every 2-3 days to keep it fresh. Once the roots reach around 1–2 inches, the young plant can be transferred into moist potting mix.
Water propagation is an easy way to produce new spider plants from an established mother plant.
Spider Plant Care in the UK
Growing spider plants indoors is often the easiest approach in the UK because temperatures and natural light can become more challenging during winter.
Place the plant in a bright room with indirect light and keep it away from cold windows, drafts, and radiators. During the darker winter months, growth may slow naturally, so the plant may not need as much water as it does during warmer periods.
Always check the soil before watering instead of following a fixed schedule. This helps prevent overwatering when the plant is growing more slowly and using less water.
Why Are My Spider Plant Leaves Turning Brown, Yellow, or Drooping?
Accurate leaf diagnosis starts with the soil and roots, not the leaf tips. Symptoms overlap across multiple causes, and treating the wrong one doesn’t just fail; it often compounds the actual problem while you keep chasing the wrong fix.
Why are spider plant leaf tips turning brown?
Most guides tell you to add humidity the moment you see brown tips. That’s not accurate, and it keeps growers stuck when the real cause goes unaddressed.
The real cause list, in rough order of likelihood:
- Inconsistent watering (cycling between bone dry and soggy)
- Fertilizer salt buildup in the soil
- Fluoride or mineral accumulation from tap water
- Genuinely low humidity (below ~35% sustained)
- Direct or excessively bright light
- Root stress from crowding or rot
Work through that list from the top before reaching for a humidifier.
Could fluoride or water chemistry cause brown tips?
Spider plants are documented to be fluoride-sensitive; this isn’t a myth. Fluoride accumulates in leaf tissue over repeated waterings and shows up as browning at the leaf margins and tips. This is distinct from chlorine. Chlorine off-gases from tap water when left standing for about 24 hours. Fluoride doesn’t evaporate. Letting water sit overnight helps with chlorine but does nothing for fluoride content. In areas with fluoridated municipal water and otherwise excellent care conditions, water chemistry can cause persistent tip browning, but only after you eliminate watering inconsistency and fertiliser salts.
Can over-fertilizing cause brown tips?
Yes, and this is significantly underdiagnosed. Salt buildup from excess or too-frequent fertilizer draws moisture away from roots and accumulates on the soil surface as a visible crust over time. The damage shows up as tip browning and leaf margin deterioration. If you’ve been feeding at full strength monthly, or feeding through winter, scale back and flush the soil thoroughly with plain water to leach out accumulated salts.
Can underwatering or low humidity cause brown tips?
Both can contribute, but don’t assume either by default. Underwatering produces tip browning alongside limp leaves and visibly dry, pulling soil. Low humidity alone rarely causes severe browning in typical indoor conditions (40–50% RH); it becomes a meaningful factor when ambient humidity drops consistently below 30–35%. Check soil and roots before adding any moisture to the air.
Why are spider plant leaves turning yellow?
Overwatering and poor drainage are the most common causes. If the soil has been consistently wet, yellowing leaves signal root stress. Lower leaves also yellow naturally as they age; this is expected behaviour, not a problem. Nutritional deficiency (particularly nitrogen) can cause general yellowing across the plant, but only after extended periods without any feeding.
Why are spider plant leaves curling or drooping?
Drooping signals moisture stress but not necessarily underwatering. Root damage from rot can create the same wilting symptom as drought because damaged roots can’t move water upward, no matter how wet the soil is. Heat stress and direct sun also cause temporary drooping. Check soil moisture first; if that isn’t the cause, unpot the plant and inspect the roots directly.
Why is my spider plant wilting even after watering?
Root damage. When roots are compromised by rot or severe compaction, they can’t absorb water even when the soil is moist. Remove the plant from its pot and check: healthy roots are firm, white or light tan; rotted roots are brown, mushy, and often smell sour. Trim damaged roots cleanly, refresh the growing medium, and water less often going forward.
Why is my spider plant losing variegation?
Light. Move a variegated plant to a lower-light position, and it will gradually produce more green foliage as it maximizes chlorophyll production. Move it back to bright indirect light to encourage the characteristic stripe or leaf margin pattern to return. This is normal cultivar behaviour, not damage, and it’s fully reversible.
How do you revive a dying spider plant?
Work through this sequence rather than guessing:
- Check soil moisture: wet, dry, or appropriate?
- Assess drainage holes: clear? Is water exiting freely?
- If drainage looks fine, inspect roots for rot.
- Review light placement: too dark or too intense?
- Check fertilizer history for salt buildup signs.
- Inspect for pests; check the undersides of leaves and the soil surface.
- Consider water source only after eliminating everything else.
Change one major factor at a time. New leaves, not old brown or yellow ones, which won’t reverse, are the reliable recovery indicator. If new growth emerges looking healthy after a change, the fix is working.
How Do You Propagate a Spider Plant?
Spider plant propagation is straightforward; the plant does most of the work. Mature plants produce spiderettes on trailing stalks without any prompting. Those babies root reliably in water or directly in soil; alternatively, you can divide the parent plant at the roots for a faster result with established foliage.
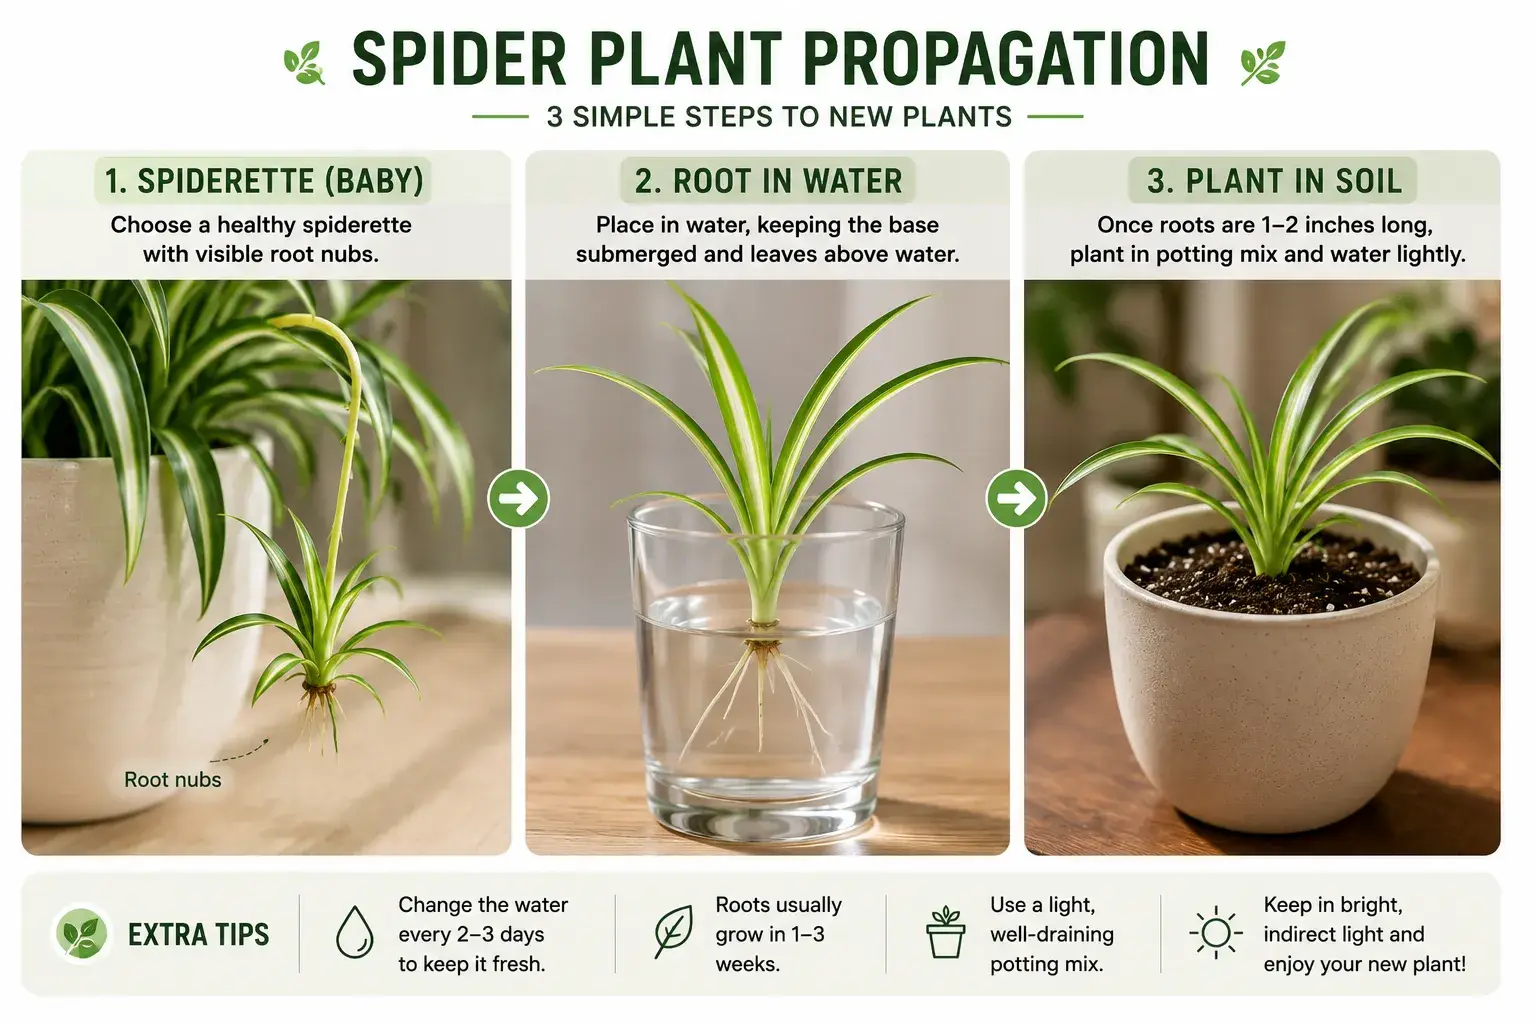
How do you propagate spider plant babies in water?
- Select a spiderette with visible root nubs at its base.
- Cut the connecting stem close to the baby using clean scissors.
- Set the base in a small container of water, keeping the foliage above the waterline.
- Change the water every 2–3 days to prevent stagnation.
- Transfer to moist potting mix once roots reach 1–2 inches.
Water roots and soil roots are structurally different. When transplanting, keep the soil slightly more moist than usual for the first week so the cutting can adapt without stress.
How do you propagate spider plant babies in soil?
Set the spiderette on lightly moist potting mix with its base touching the surface, and pin it in place with a bent wire if it won’t stay put. Keep the mix consistently moist, not wet, for 2–4 weeks until rooted. If the baby is still attached to the mother plant at the stem nodes, leave that connection intact while rooting happens. Cut it only after the new plant can support itself independently.
Can you propagate spider plants by division?
Yes. When repotting a mature plant, divide the root mass into 2–3 sections, each with healthy roots and several leaves. Repot each division immediately, water lightly, and keep out of direct light until re-established, typically 1–2 weeks.
Propagating babies in winter possible or not?
Propagating spider plant babies in winter is possible but noticeably slower. Cooler temperatures and lower light extend rooting time considerably. For most growers without supplemental grow lighting and a consistently warm environment, waiting until spring produces faster, more reliable results.
Where Should You Put a Spider Plant?
The best indoor spot for a spider plant is any bright location with indirect light for most of the day, protected from harsh afternoon sun, cold drafts, and direct heat sources. The room matters less than the specific light quality at the exact spot; a bright bathroom beats a dim living room every time.
Which room is best for a spider plant?
Living rooms and kitchens near east or north-facing windows are consistently reliable. Bedrooms work if the window provides reasonable light; darker bedrooms produce thin, pale, leggy growth. Bathrooms with good natural light offer the bonus of slightly higher ambient humidity, which the plant handles well. But choose the placement for light quality first; humidity is a secondary benefit, not the deciding factor.
Do spider plants need to hang?
No. Hanging baskets are a popular choice because trailing spiderette stems look dramatic at height, but spider plants grow perfectly well on a shelf, tabletop, or windowsill. The hanging setup is purely aesthetic; the plant doesn’t care about elevation.
Are bathrooms and kitchens good places for spider plants?
Both can work well, as long as the light is adequate. A bathroom with a small frosted window and minimal natural light is a worse environment than a kitchen with a large east-facing one. Light always decides; humidity is a secondary bonus when it’s already there.
How close should a spider plant be to a window?
Within 3–5 feet for good indirect light. East-facing windows are generally safe closer to the glass. South or west-facing windows in summer generate significant heat near the glass, so add distance or use a sheer curtain to diffuse the intensity before it reaches the foliage.
How Should You Care for a Spider Plant in Winter?
Winter spider plant care is mostly about doing less, not more. Growth slows considerably through the low-light months, soil dries more slowly than it did in summer, and overwatering becomes an easier mistake to make than underwatering. Adjusting to actual conditions rather than a fixed calendar is the right approach.
What happens to spider plants in winter?
Expect significantly slower growth and reduced or absent spiderette production. This is normal reduced-growth behaviour, not a sign something is wrong. The plant is resting, not declining.
How often should you water a spider plant in winter?
Check the soil before every watering; the interval naturally extends as light drops and evaporation slows. A plant watered every 5 days in summer may comfortably go 12–14 days in winter with no change in pot or position. Follow the soil, not the calendar.
How do you protect spider plants from cold?
Keep plants away from cold drafts near exterior windows and doors. Don’t let foliage contact cold glass overnight. Heating vents pointed directly at the plant dry out foliage faster than expected, creating drought symptoms that don’t match your watering schedule.
How do you manage dry winter air?
A small humidifier near the plant is the most effective option. Grouping plants slightly raises local humidity. Pebble trays provide minimal benefit; don’t rely on them as the primary approach to winter humidity management.
Does Tap Water Cause Brown Tips on Spider Plants?
Tap water can contribute to persistent brown tips, but it’s rarely the first variable to investigate. Overwatering, poor drainage, and fertilizer salt buildup can all produce the same symptom and are more commonly the real cause. Eliminate those first before looking at the water source.
Why might water quality affect brown tips?
Spider plants are sensitive to fluoride, which accumulates in leaf tissue over repeated waterings and eventually shows as browning at the tips and leaf margins. This is distinct from chlorine. Chlorine off-gases from tap water when left standing for about 24 hours, so the old advice to “let water sit overnight” does help with chlorine. Fluoride doesn’t evaporate. Sitting overnight changes nothing about fluoride content. In areas with fluoridated municipal water, this is a legitimate contributing cause, but it’s only worth investigating once you’ve confirmed watering and fertilizer aren’t the problem.
Should you use filtered or distilled water?
If you’ve genuinely ruled out other causes and browning persists, switching to filtered or distilled water is a reasonable experiment, not a universal prescription. Plenty of growers use tap water without problems. Local water chemistry varies dramatically; what affects plants in one city may be completely irrelevant in another.
How can you test tap water vs distilled water?
Here’s an actual testing method worth following: keep every variable identical same pot, same soil, same light placement, same fertilizer dosage and change only the water source. Photograph new leaf tips at the same angle weekly for 6–8 weeks. Evaluate new growth only; existing tip damage won’t reverse regardless of what changes. Don’t draw any conclusions from old leaves. This experiment is only worth running after you’ve genuinely eliminated every other cause; otherwise, you’re testing the wrong variable, and any result you observe will be misleading.
Which Spider Plant Varieties, Flowers, and Pet-Safety Facts Matter?
Spider plants include several popular cultivars, produce small flowers that lead to the spiderettes most growers know, and are widely considered safe for households with pets, with one honest caveat.
Which spider plant varieties are most popular?
| Variety | Leaf Description |
| ‘Vittatum’ | Green leaves with central white stripe most widely sold |
| ‘Variegatum’ | Green leaves with white leaf margins |
| Reverse Variegatum | White center stripe, green margins |
| ‘Bonnie’ | Curly, wavy foliage with central stripe |
| Hawaiian | Solid green, no stripe |
| ‘Mandaianum’ | Compact growth, yellow-striped |
Do spider plants flower?
Yes, mature plants produce small white blooms on long, arching flower stalks. This inflorescence is the same structure from which spiderettes eventually develop. Flowering is most likely when the plant receives good indirect light and is slightly root-bound. The blooms are modest; the trailing plantlets they produce are what make spider plant flowering worth paying attention to.
Are spider plants safe for cats and dogs?
The ASPCA lists Chlorophytum comosum as non-toxic to cats and dogs, a classification maintained as of 2026. Cats in particular seem attracted to spider plants, possibly due to a mild compound in the foliage with an effect loosely comparable to catnip. Consuming significant amounts can cause mild vomiting or digestive upset. Non-toxic doesn’t mean unlimited snacking is without consequence.